Compression and encryption
for SQL backups
SQL Backup creates smaller, safer, faster backups of SQL Server databases:
* Backups are compressed, reducing storage space and hardware requirements (often known as "database zip").
* Backups are created in less time than native backups.
* Backups are securely encrypted.
Native SQL Server backups are essentially just a dump of data stored in SQL Server .mdf and .ldf files. This is an inefficient and insecure way of storing backup data as it is stored unencrypted, unprotected and
uncompressed.
Versions of SQL Server supported:
SQL Backup supports SQL Server 2000.
Features of SQL
Backup
- Compression – 3 levels
of compression, giving you
a choice to optimize for
speed or size.
- GUI interface – use
the user-friendly wizards
to guide you through the
backup and restore process.
- Command line interface
– for power users who
want total control of SQL
Backup. Use syntax similar
to T-SQL's BACKUP and
RESTORE commands to set up
your maintenance plans.
- Extended stored
procedure interface –
allows you to run SQL
Backup remotely via your
favorite database
connectivity tool.
- 128-bit Rijndael
encryption – secure your
backup files from
unauthorized access.
- Split backups – take
advantage of multi-CPU and
high speed disk array
systems to speed up the
backup and restore process
even more.
- Mirrored backups –
create two or more backup
files simultaneously to
different disks, to
minimize the probability
of media errors.
- MD5# tamper detection.
- Log
shipping with
very low setup overheads.
Backup,
compression, encryption and
email notification
SQL Backup is extremely
simple to operate. After we
have installed SQL Backup on
the machine running SQL Server,
we can start creating backups
using SQL Backup. We start by
logging into our SQL Server.
In this case we will use
Windows authentication, but
you could choose to use SQL
Server authentication.
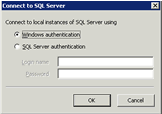
Screenshot 1.
Logging in to SQL Server
The overview window shows
SQL Server's backup activity
log and backup processes log.
Backup history is provided on
a per database basis.
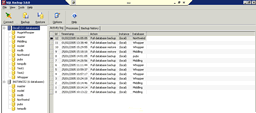
Screenshot 2.
Viewing SQL Server's backup
activity log in SQL Backup
Next we'll backup a
database. We do this through
the Backup wizard, which is
launched from the Backup
wizard button.
Screenshot 3.
Launching the Backup wizard
The introductory wizard
screen provides the means to
use the settings of backups
that have been run previously
– this can save us time in
configuring the backup if the
appropriate settings have
already been decided. We're
going to create a new backup.
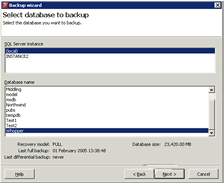
Screenshot 4.
Choose the database to be
backed up
Next, we select which
database we are going to
backup. We'll choose the
Whopper database, which is
over 23 GB and is stored
locally.
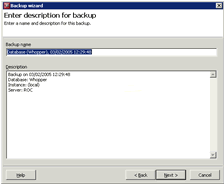
Screenshot 5. Name
the backup and provide a
description
Next, the backup is named
and a description of the
backup is determined. We are
going to use the default
values, which provide the
information that most users
would need.
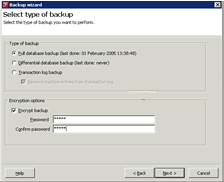
Screenshot 6.
Choose the backup type and
whether to use encryption
We then define the backup
from a backup type and
security perspective. We offer
full, differential or
transaction log backups. Then
we need to choose whether we
want to use encryption. We're
going to choose a full backup
with encryption.
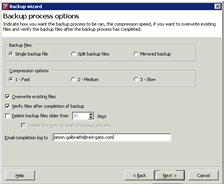
Screenshot 7.
Define backup processes
Next, we are going to
define our backup process. We
can define whether the backup
is a single file, split
between multiple files, or
copied simultaneously into two
or more places. Splitting the
backup across multiple files
reduces the time it takes to
create a backup.
There are 3 compression
options. Deciding which of
these options is for you,
depends on your specific
circumstances – there is a
good article in our Help
file to guide you in making
these choices.
We can also decide whether
to overwrite existing files,
verify that the files have
been created successfully, and
clean up old backup files.
Finally, we can choose to send
out an email notification
about the backup.
We're going to choose the
simple options that will make
it easy to schedule this later
on: A single file, fast
compression, overwrite
previous files, verify the
files, and "email Simon
Galbraith" notification
when it is done.
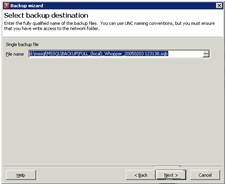
Screenshot 8. Name
the backup destination
Finally, we name the backup.
We're going to use the default,
which is configurable, in case
you need to use another name.
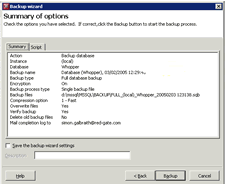
Screenshot 9. View
a summary of all chosen
options
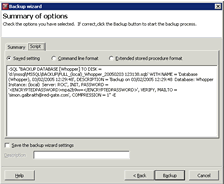
Before we commit to the
backup, we view all the
options we've chosen in this
neat summary page. This setup
is also saved as a transaction
SQL script for use in either a
command line or in executing a
server-side command via a
stored procedure – we're
going to use this script for
our scheduling later, so I'm
going to copy this to my
clipboard for use then.
Screenshot 10.
View the script
We're now ready to backup
our database so we click
"Backup" to
continue.
Screenshot 11.
Successfully backing up the
database.
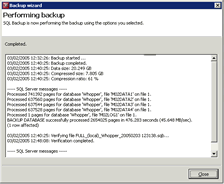
We can now see that the
database backup has succeeded
and the file has been written
uncorrupted. Summary
information is provided.
We've backed up a 23 GB
database, with over 2.5
million pages, in 8 minutes.
The database has been
compressed to 7.8 GB, a 61%
reduction in size. The same
operation, using native SQL
Server backup on this machine,
takes 25 minutes.
By checking our email, we
can also see that the email
notification of the successful
backup has arrived.
In addition, the activity
log will have been updated.
In a very short time, we've
gone from uncompressed, slow,
unprotected database backups
to small, fast, and secure
database backups.
Scheduling
a backup
Many users, once they have
investigated SQL Backup via
the graphical user interface,
prefer to use SQL Backup
within their existing SQL
Server management tools via a
command line or extended
stored procedure. Using the
extended stored procedure is
simpler to tie in with most
SQL Server management tools
but, if you are constrained in
using extended stored
procedures on your database
server, you can achieve
everything using the command
lines with only slightly more
effort.
The extended stored
procedure isn't installed as a
default but is very
straightforward to install or
uninstall from the Program
Files menu or via the "Tools"
menu in the GUI.
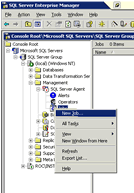
The simplest way to
schedule backups is to use
Enterprise Manager's
"Job" function.
Screenshot 12.
Create a new job
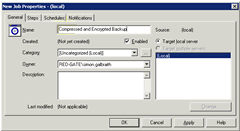
We are going to create a
new job that we'll configure
to run hourly, so that our
backup is, at most, one hour
old.
Screenshot 13.
Define job properties
This dialog box takes all
of the information needed to
configure the job. We'll call
this "Compressed and
encrypted backup". In the
"Steps" tab we
define the script our job will
run.
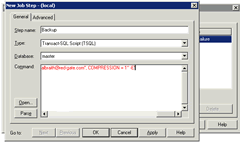
Screenshot 14.
Define the script the job
will run
We'll call the step
"Backup" and paste
in the T-SQL that we copied
from the Backup wizard a few
moments ago.
Now, using the "Schedules"
tab, we set up our job so it
runs hourly.
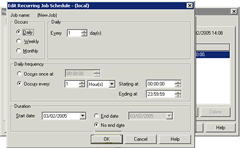
Screenshot 15.
Schedule the job
In a few minutes we've
set up our compressed and
encrypted hourly backup with
email notification.
Restoring
a database
Now that we've created
backups, we're going to see
how we can restore the
database. This is also
significantly faster than
the Restore functionality
native to SQL Server.
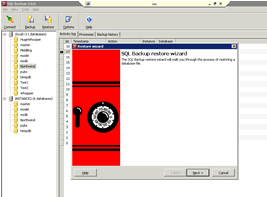
Screenshot 16.
SQL Backup's Restore wizard
Restoring a database is
done using SQL Backup's
Restore wizard.
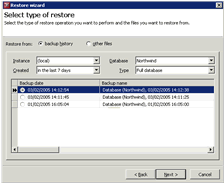
Screenshot 17.
Choose database to restore
SQL Backup provides a
filtering mechanism for
identifying the backup we
want to restore. We're going
to restore the Northwind
database. By default, the
most recent database backup
is highlighted.
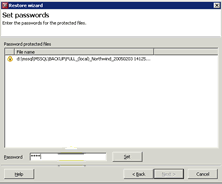
Screenshot 18.
Enter the password used
Next, we provide the
password that we are using
to protect our backup.
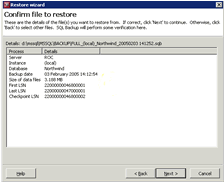
Screenshot 19.
Check the correct database
is being restored
Now, we check that we
have chosen the right backup
to restore.
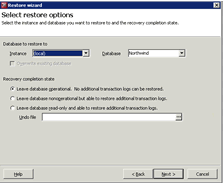
Screenshot 20.
Decide on restore options
Next, we decide on our
restore options. The "Recovery
completion state" is
exactly as you would find in
SQL Server.
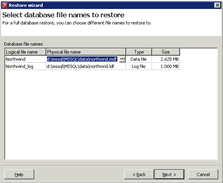
Screenshot 21.
Edit file names and
locations
We can edit the file
names and locations of the
databases.
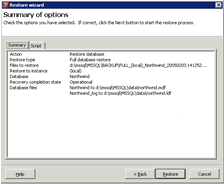
Screenshot 22.
Check the summary
Finally, we check a
summary of our Restore. Now
let's restore our database.
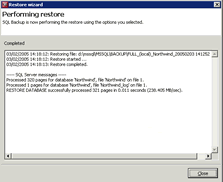
Screenshot 23.
Restore the database
Our database is
successfully restored.
Restores using SQL Backup
are much faster than native
backups. For example,
restoring the Whopper
database, used in the Backup
part of this walk-through,
was 3 times faster than
using native backup.
We've only had time to
give a very brief overview
of what SQL Backup can do.
If you're a SQL Server DBA
and you'd like to
investigate using SQL Backup
on your databases, the best
way to do so is by making
use of our 14-day, fully
functional, free
trial.
|